Getting Started
Before getting started, it is highly recommended to check the eligibility concepts page if you're not familiar with the identifiers and entity concepts used in the API. The Eligibility section contains detailed information on what eligibility is and how it works inside Wellhub's ecosystem.
The API lets you sync employee eligibility from your HR system so employees can access Wellhub as soon as they are added (and removed when they leave). This guide covers the basics you need to start integrating.
Architecture style
The API follows REST conventions and uses JSON for request and response bodies.
- Endpoints align to HTTP methods and resources.
- Responses use standard HTTP status codes for success and errors.
- Requests and responses are JSON.
The API Sandbox will return synthetic data for testing purposes, mimicking the patterns and structure of the API - actions taken will only be reflected in the synthetic data returned in the response, no users sent to the Sandbox will be created, updated or deleted.
Authentication
Authentication uses the OAuth 2.0 client credentials flow. Your integration uses a Client ID and Client Secret to request a short‑lived access token, then sends that token as a Bearer token on every API call.
You can create and manage OAuth credentials in Wellhub for Companies web page, under Settings.
Create API credentials
Use the Wellhub for Companies portal to generate credentials for your integration.
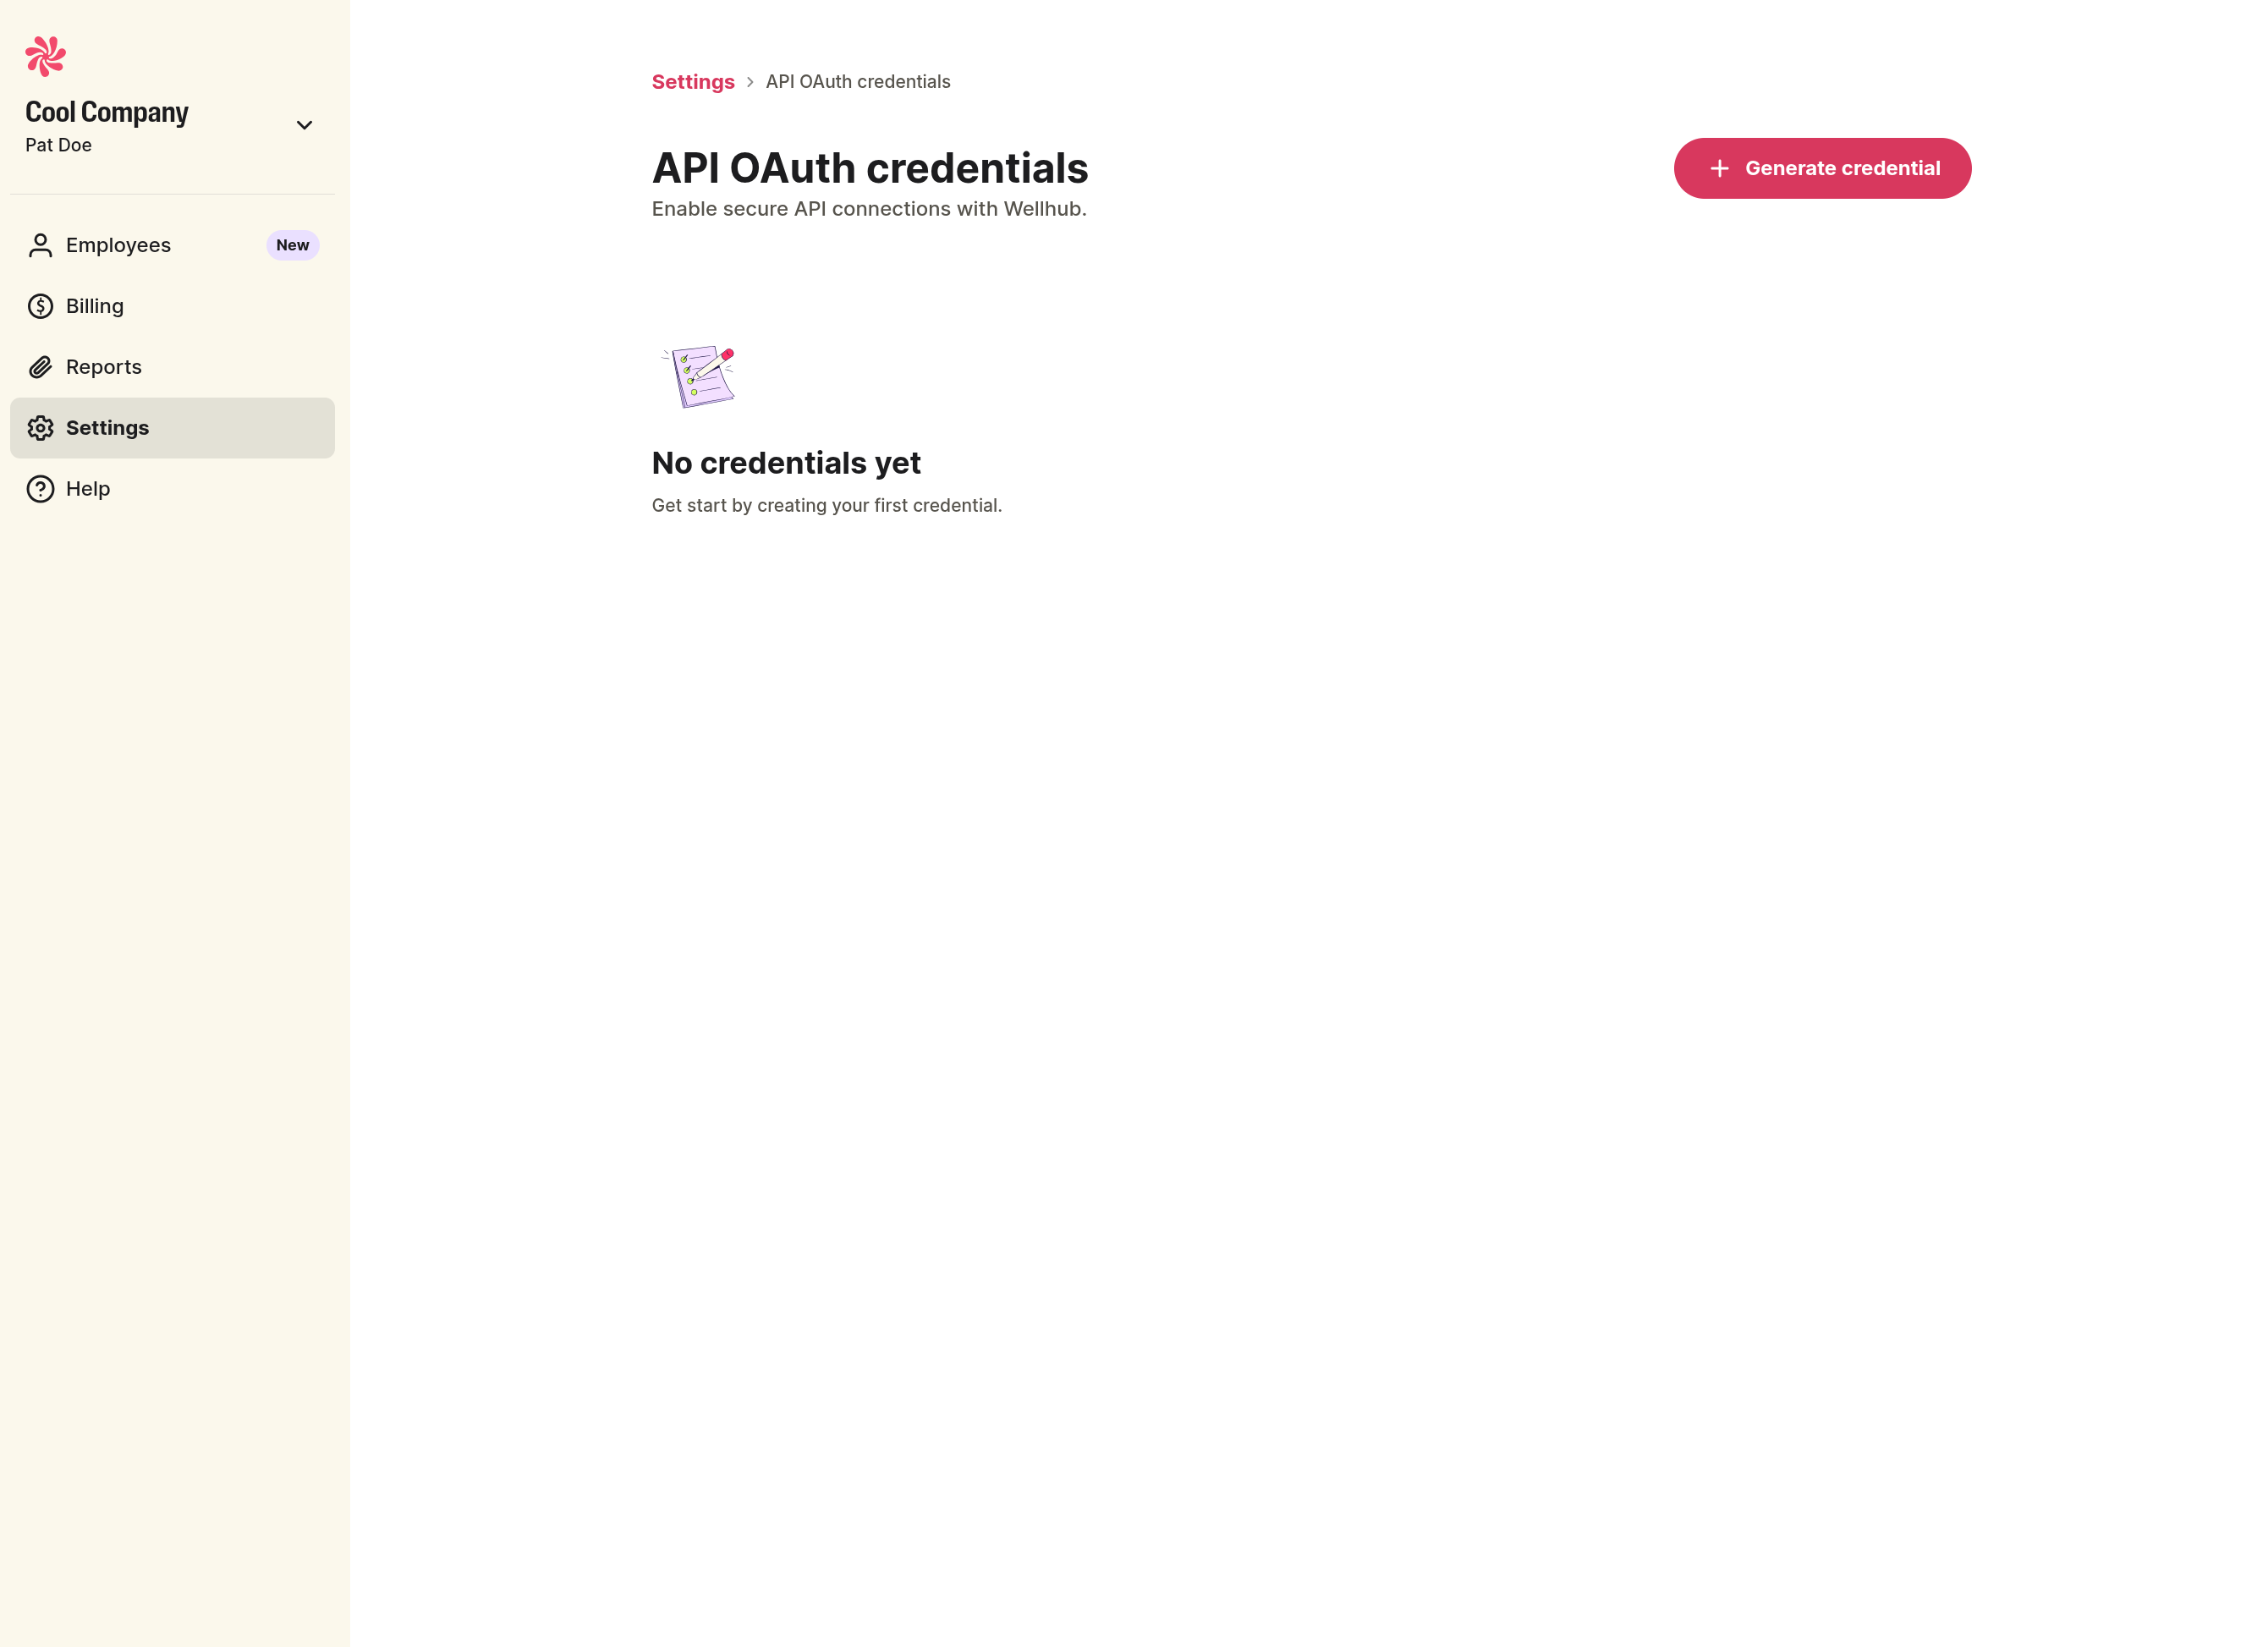
1) Open API OAuth credentials
From the left navigation, go to Settings and open API OAuth credentials. If you have no credentials yet, you will see an empty state with a Generate credential button.
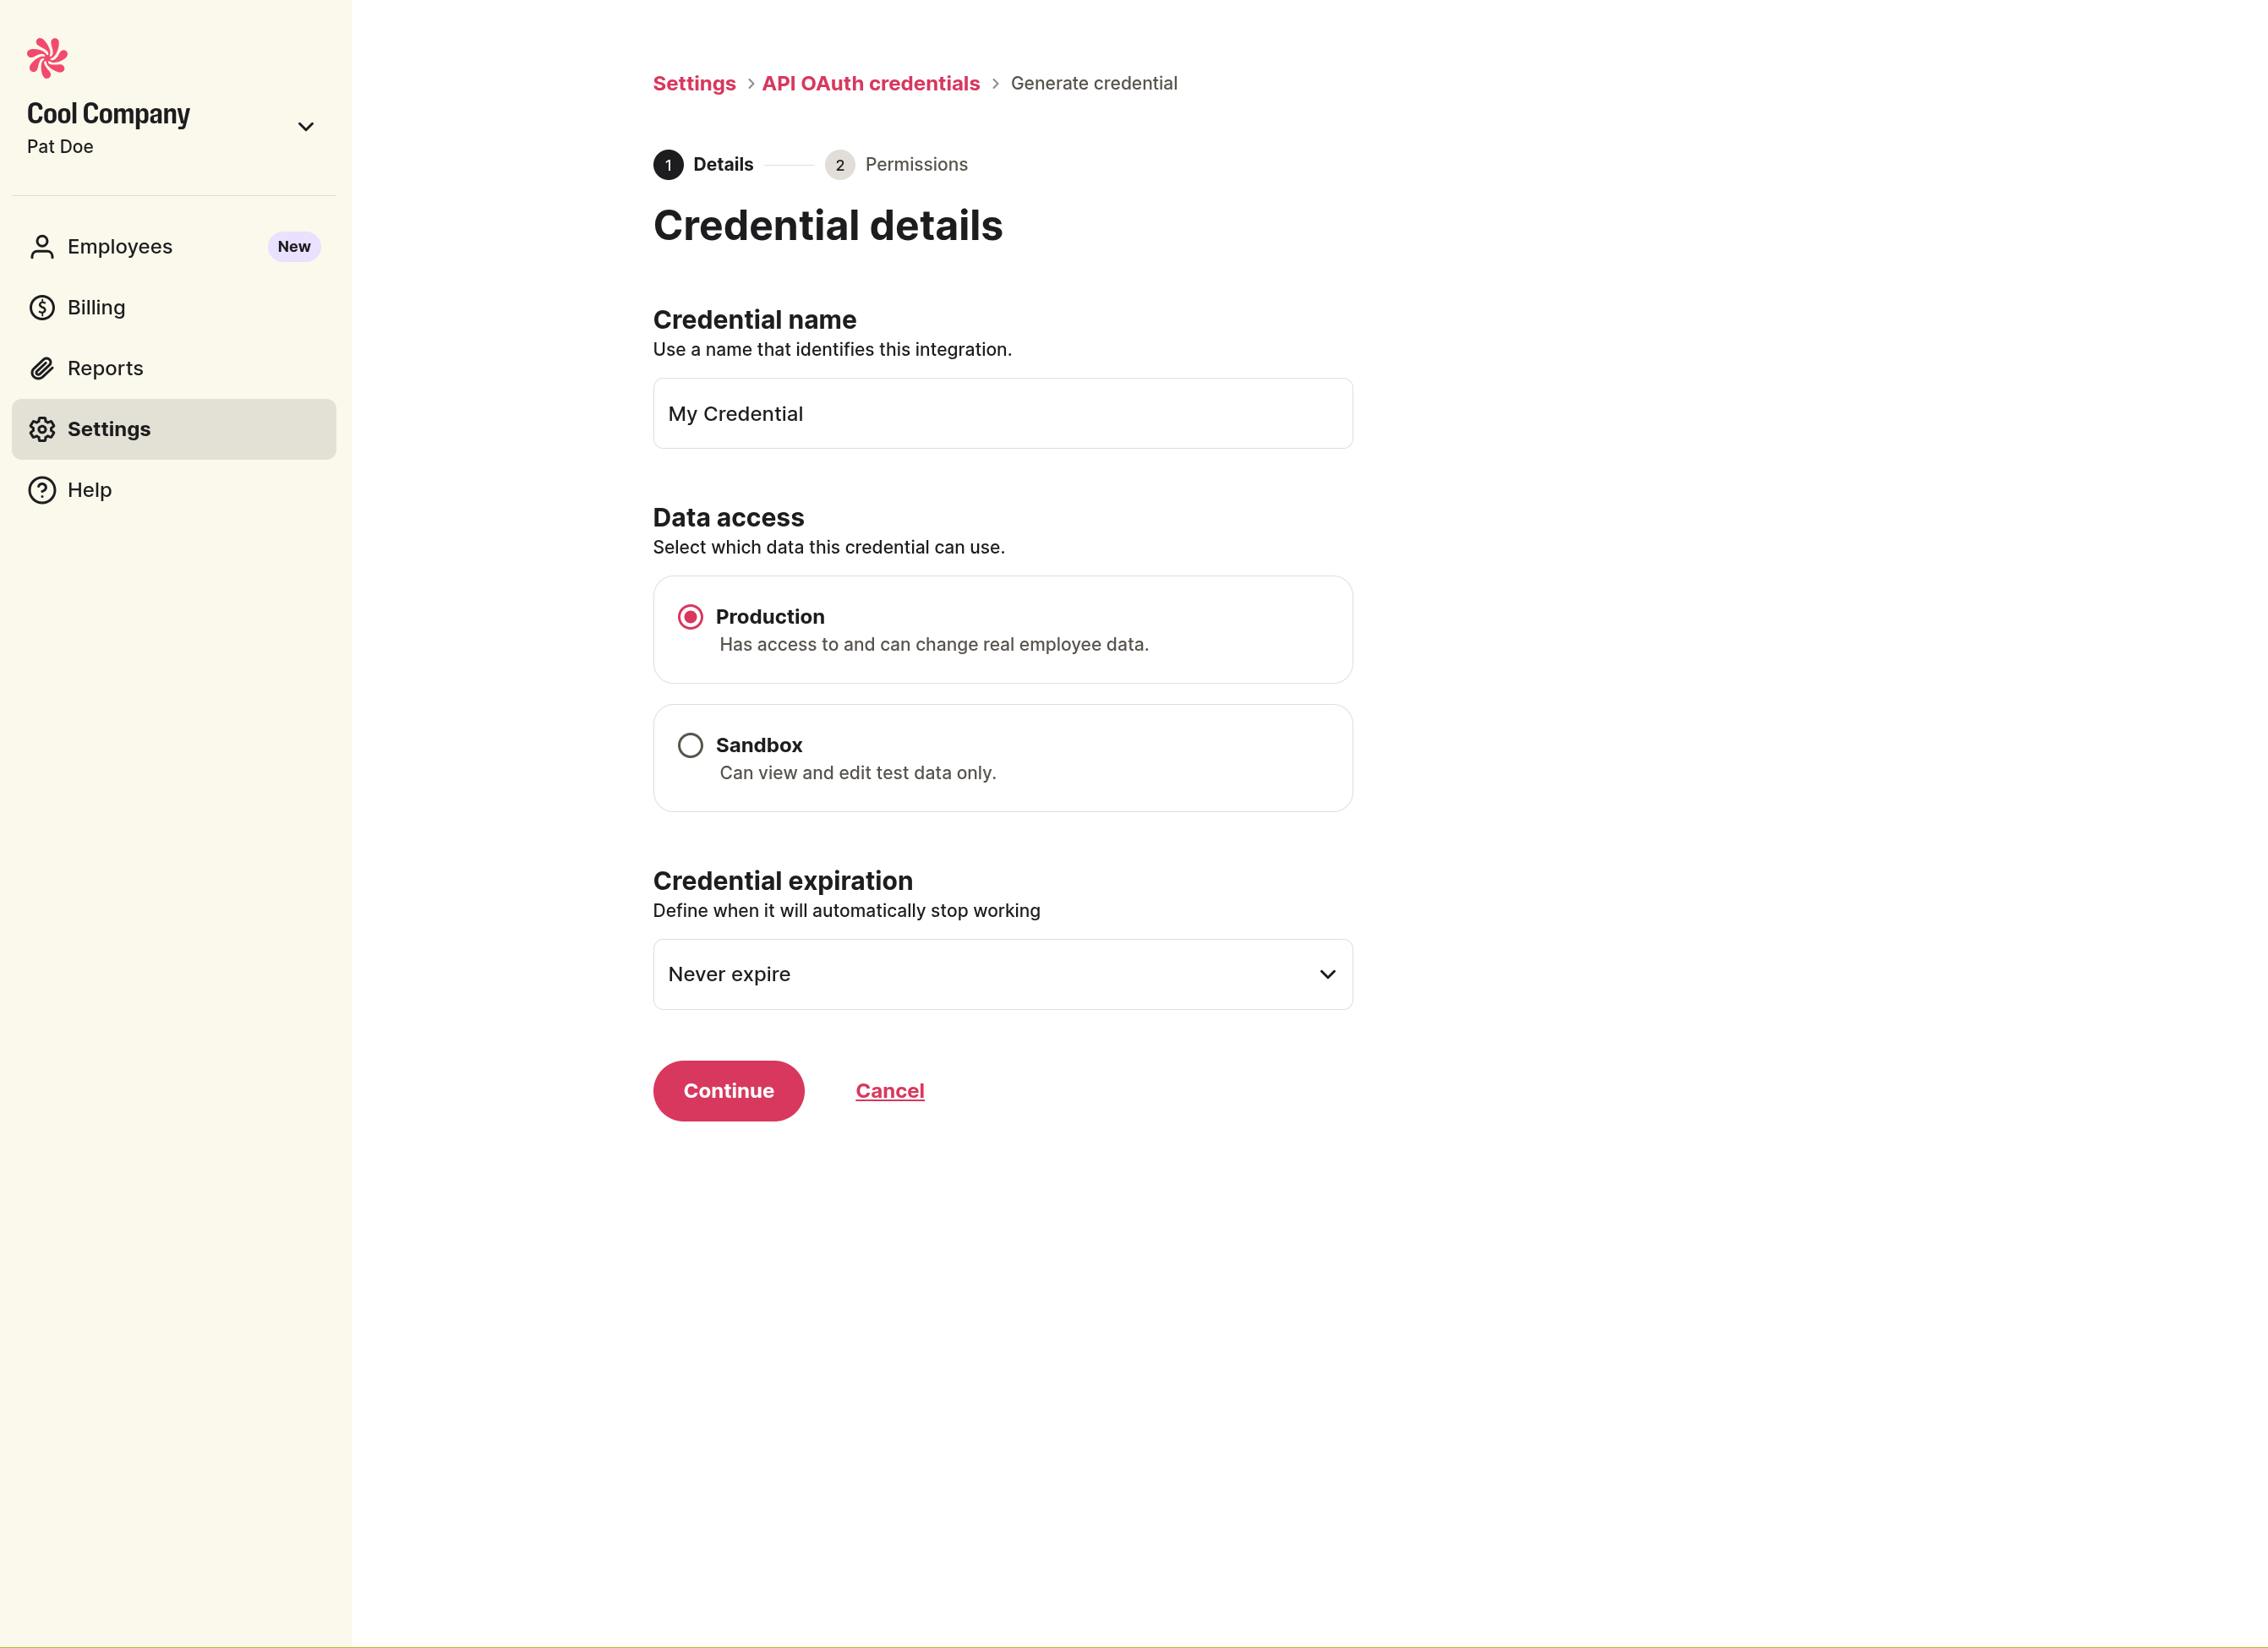
2) Enter credential details
Click Generate credential, then fill in:
- Credential name to identify the integration.
- Data access: choose Production for live data or Sandbox for testing.
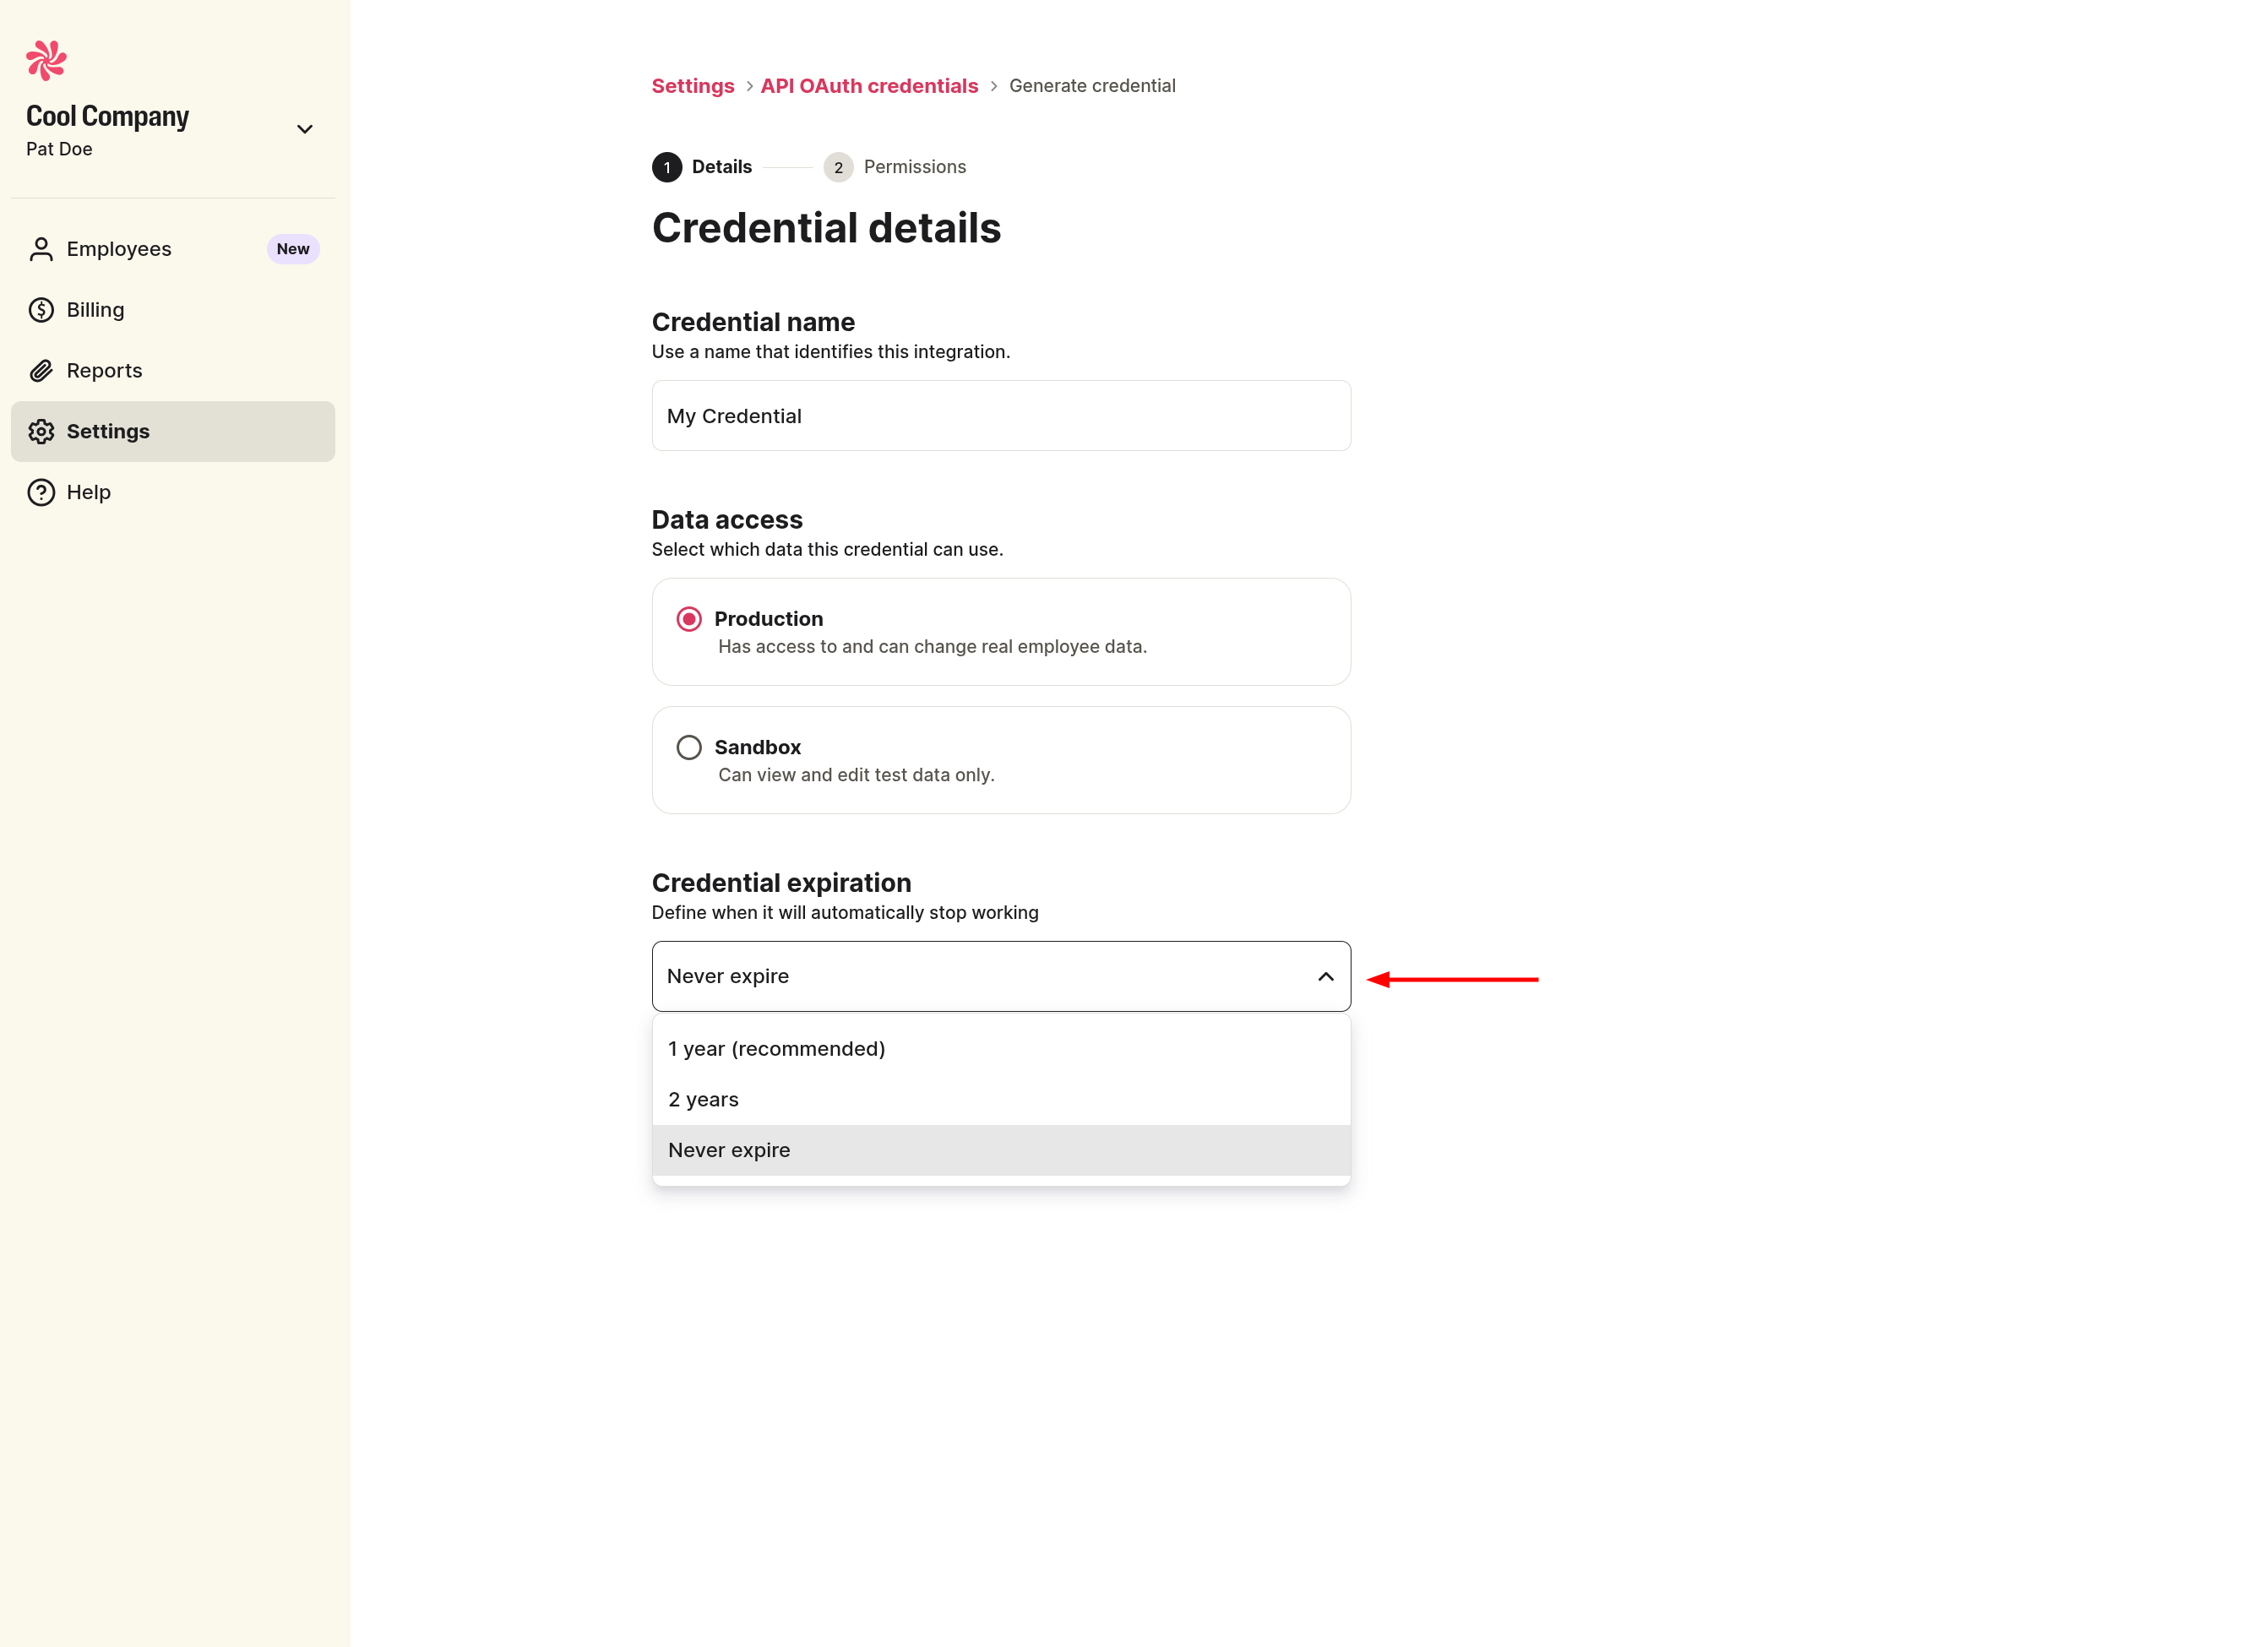
- Credential expiration: set a duration or choose Never expire.
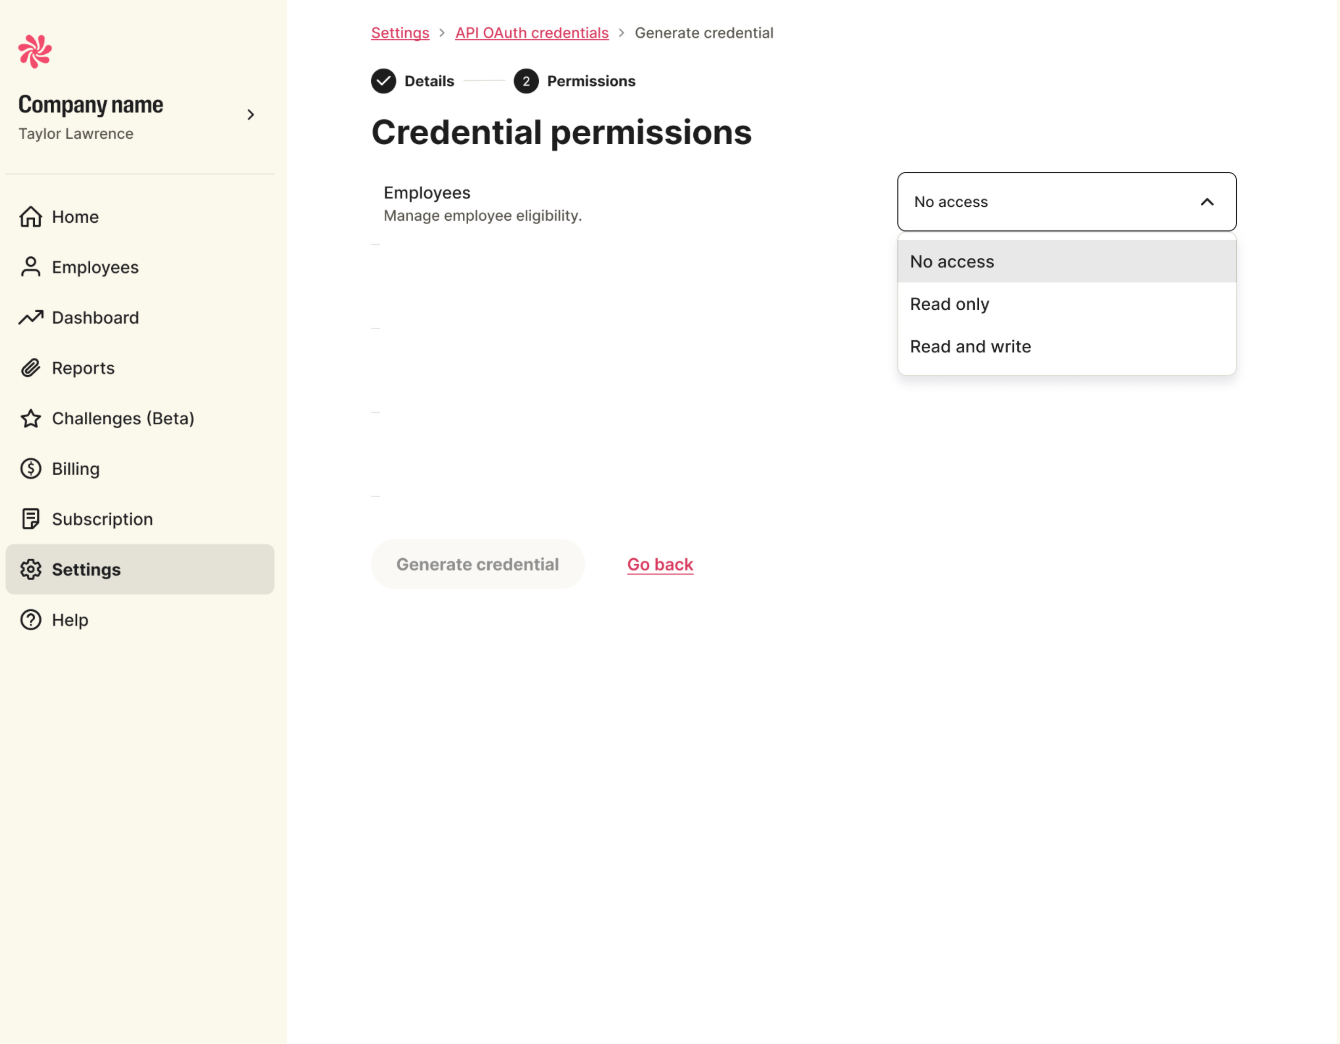
3) Set permissions
Choose the access level for each product area, then click Generate credential.
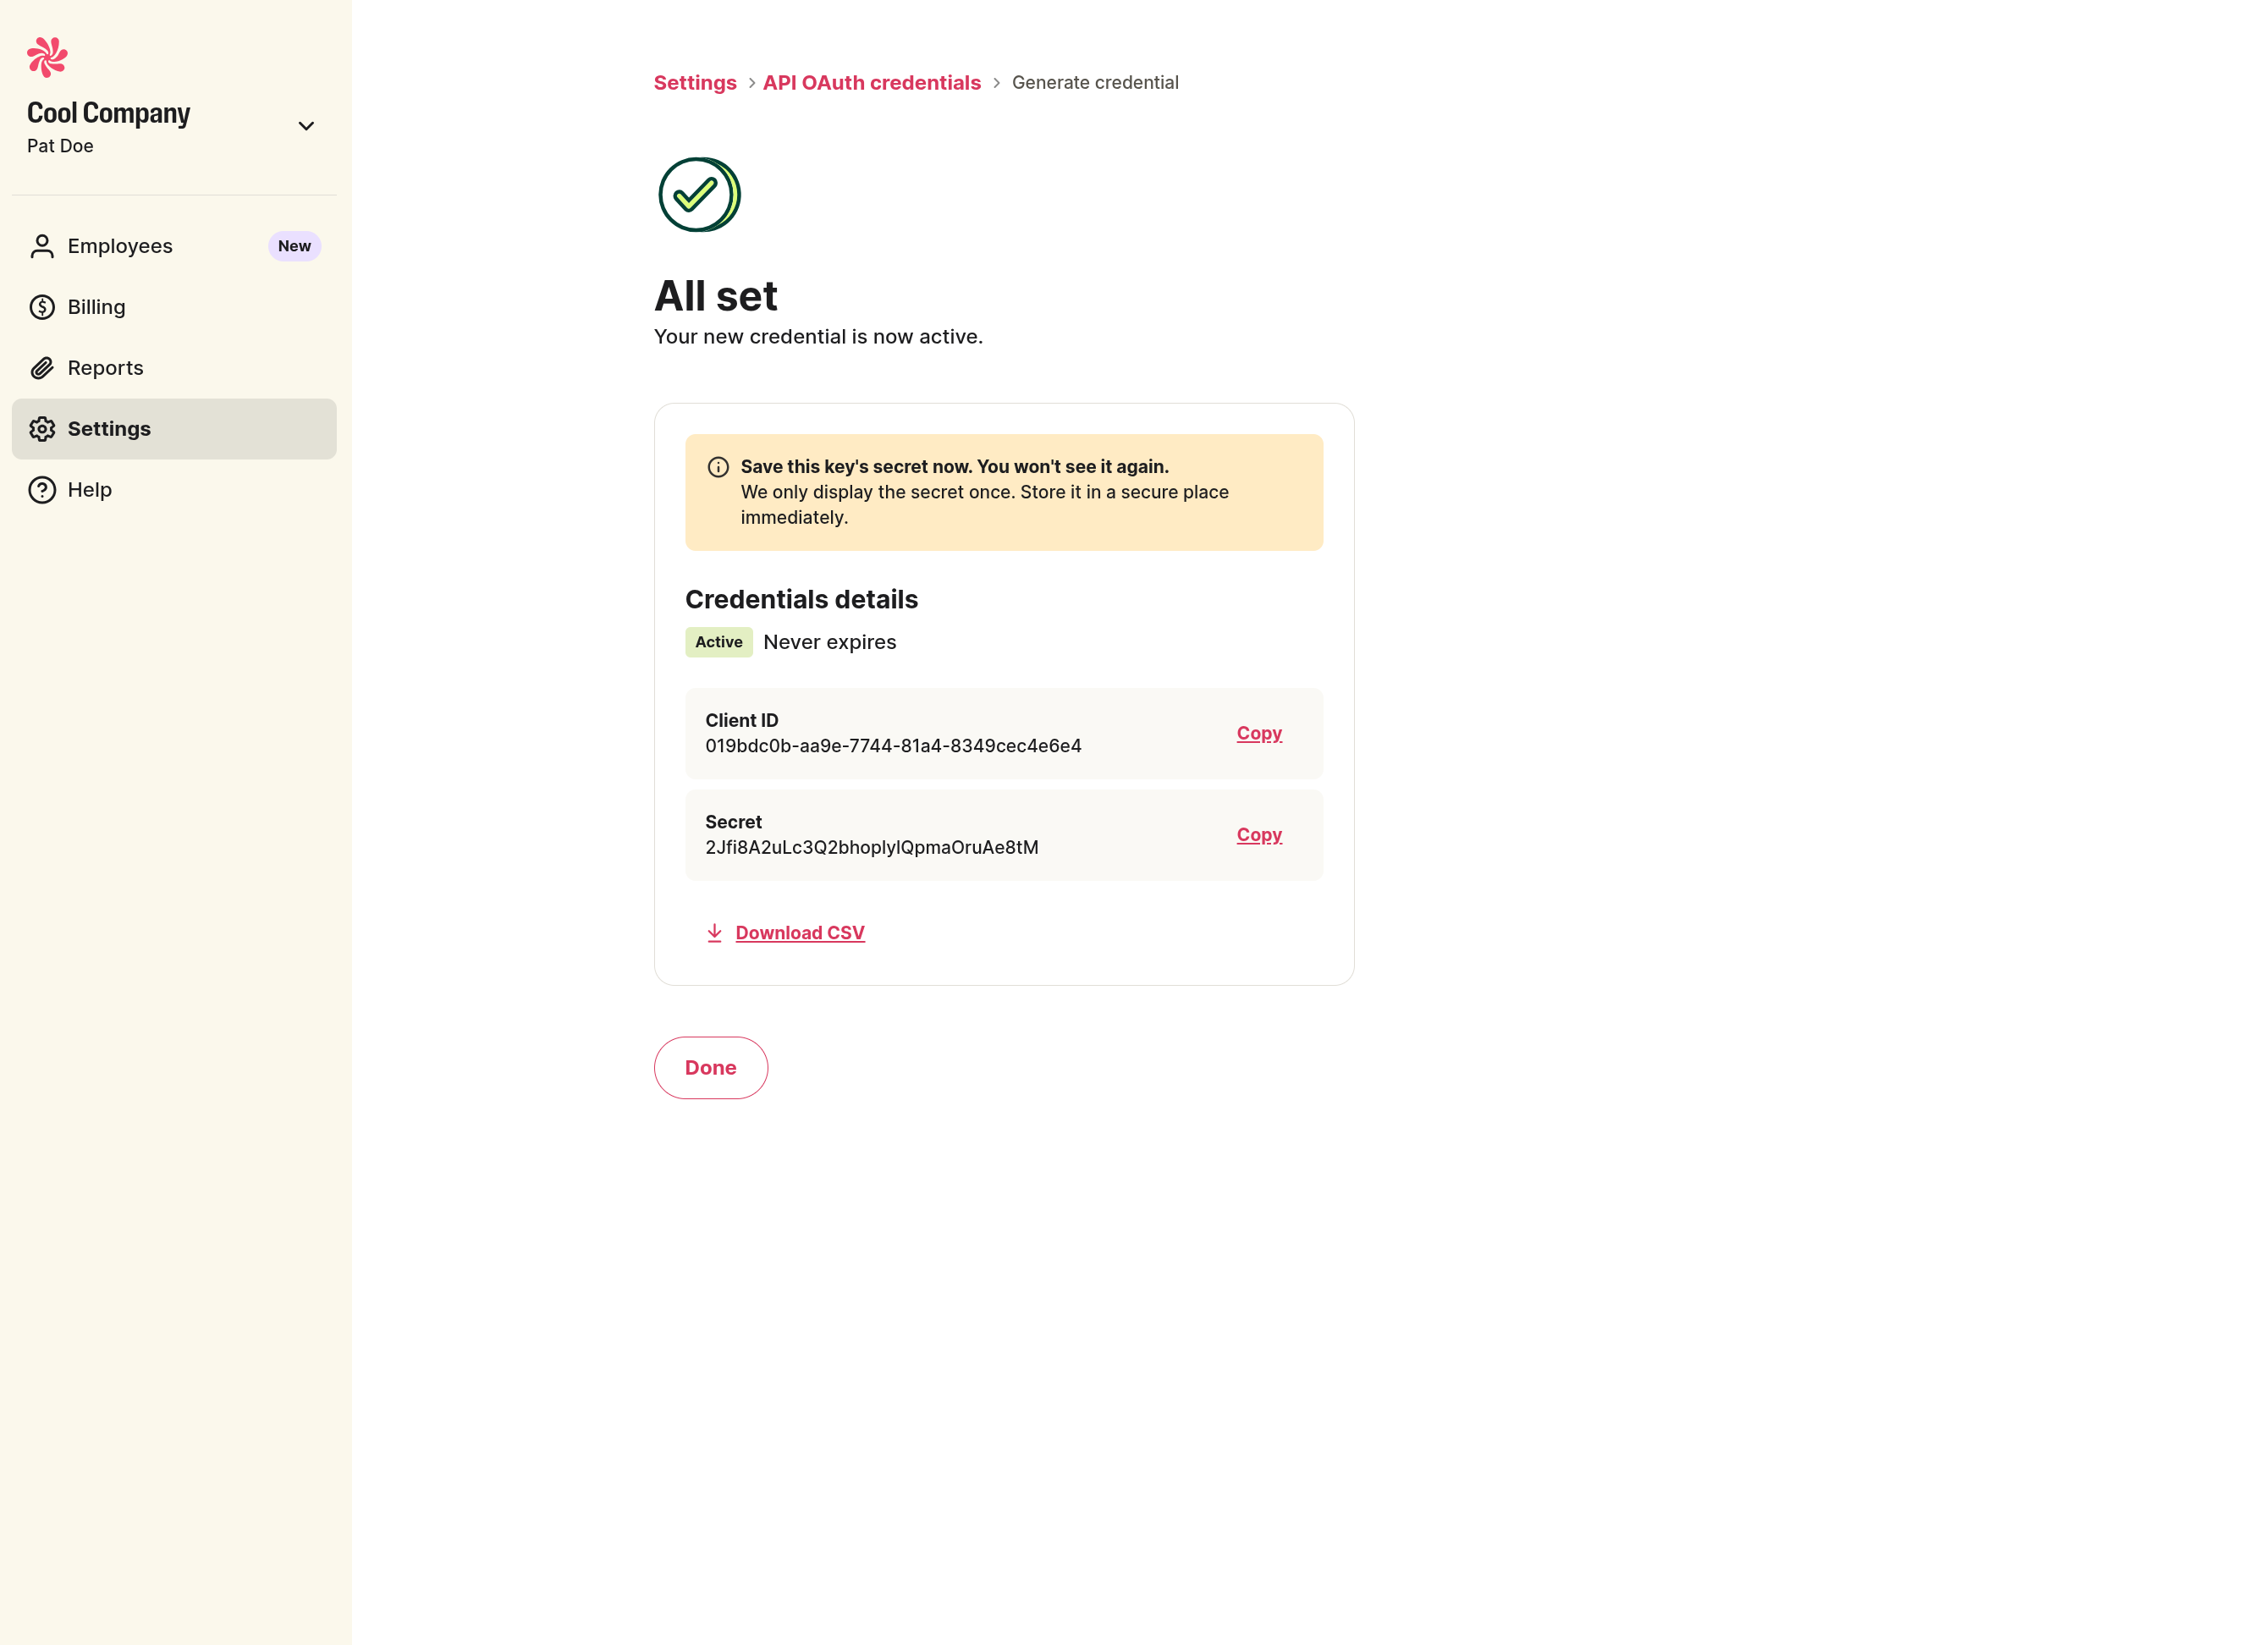
4) Save your client secret
After creation, the portal shows your Client ID and Secret once. Store the secret securely right away.
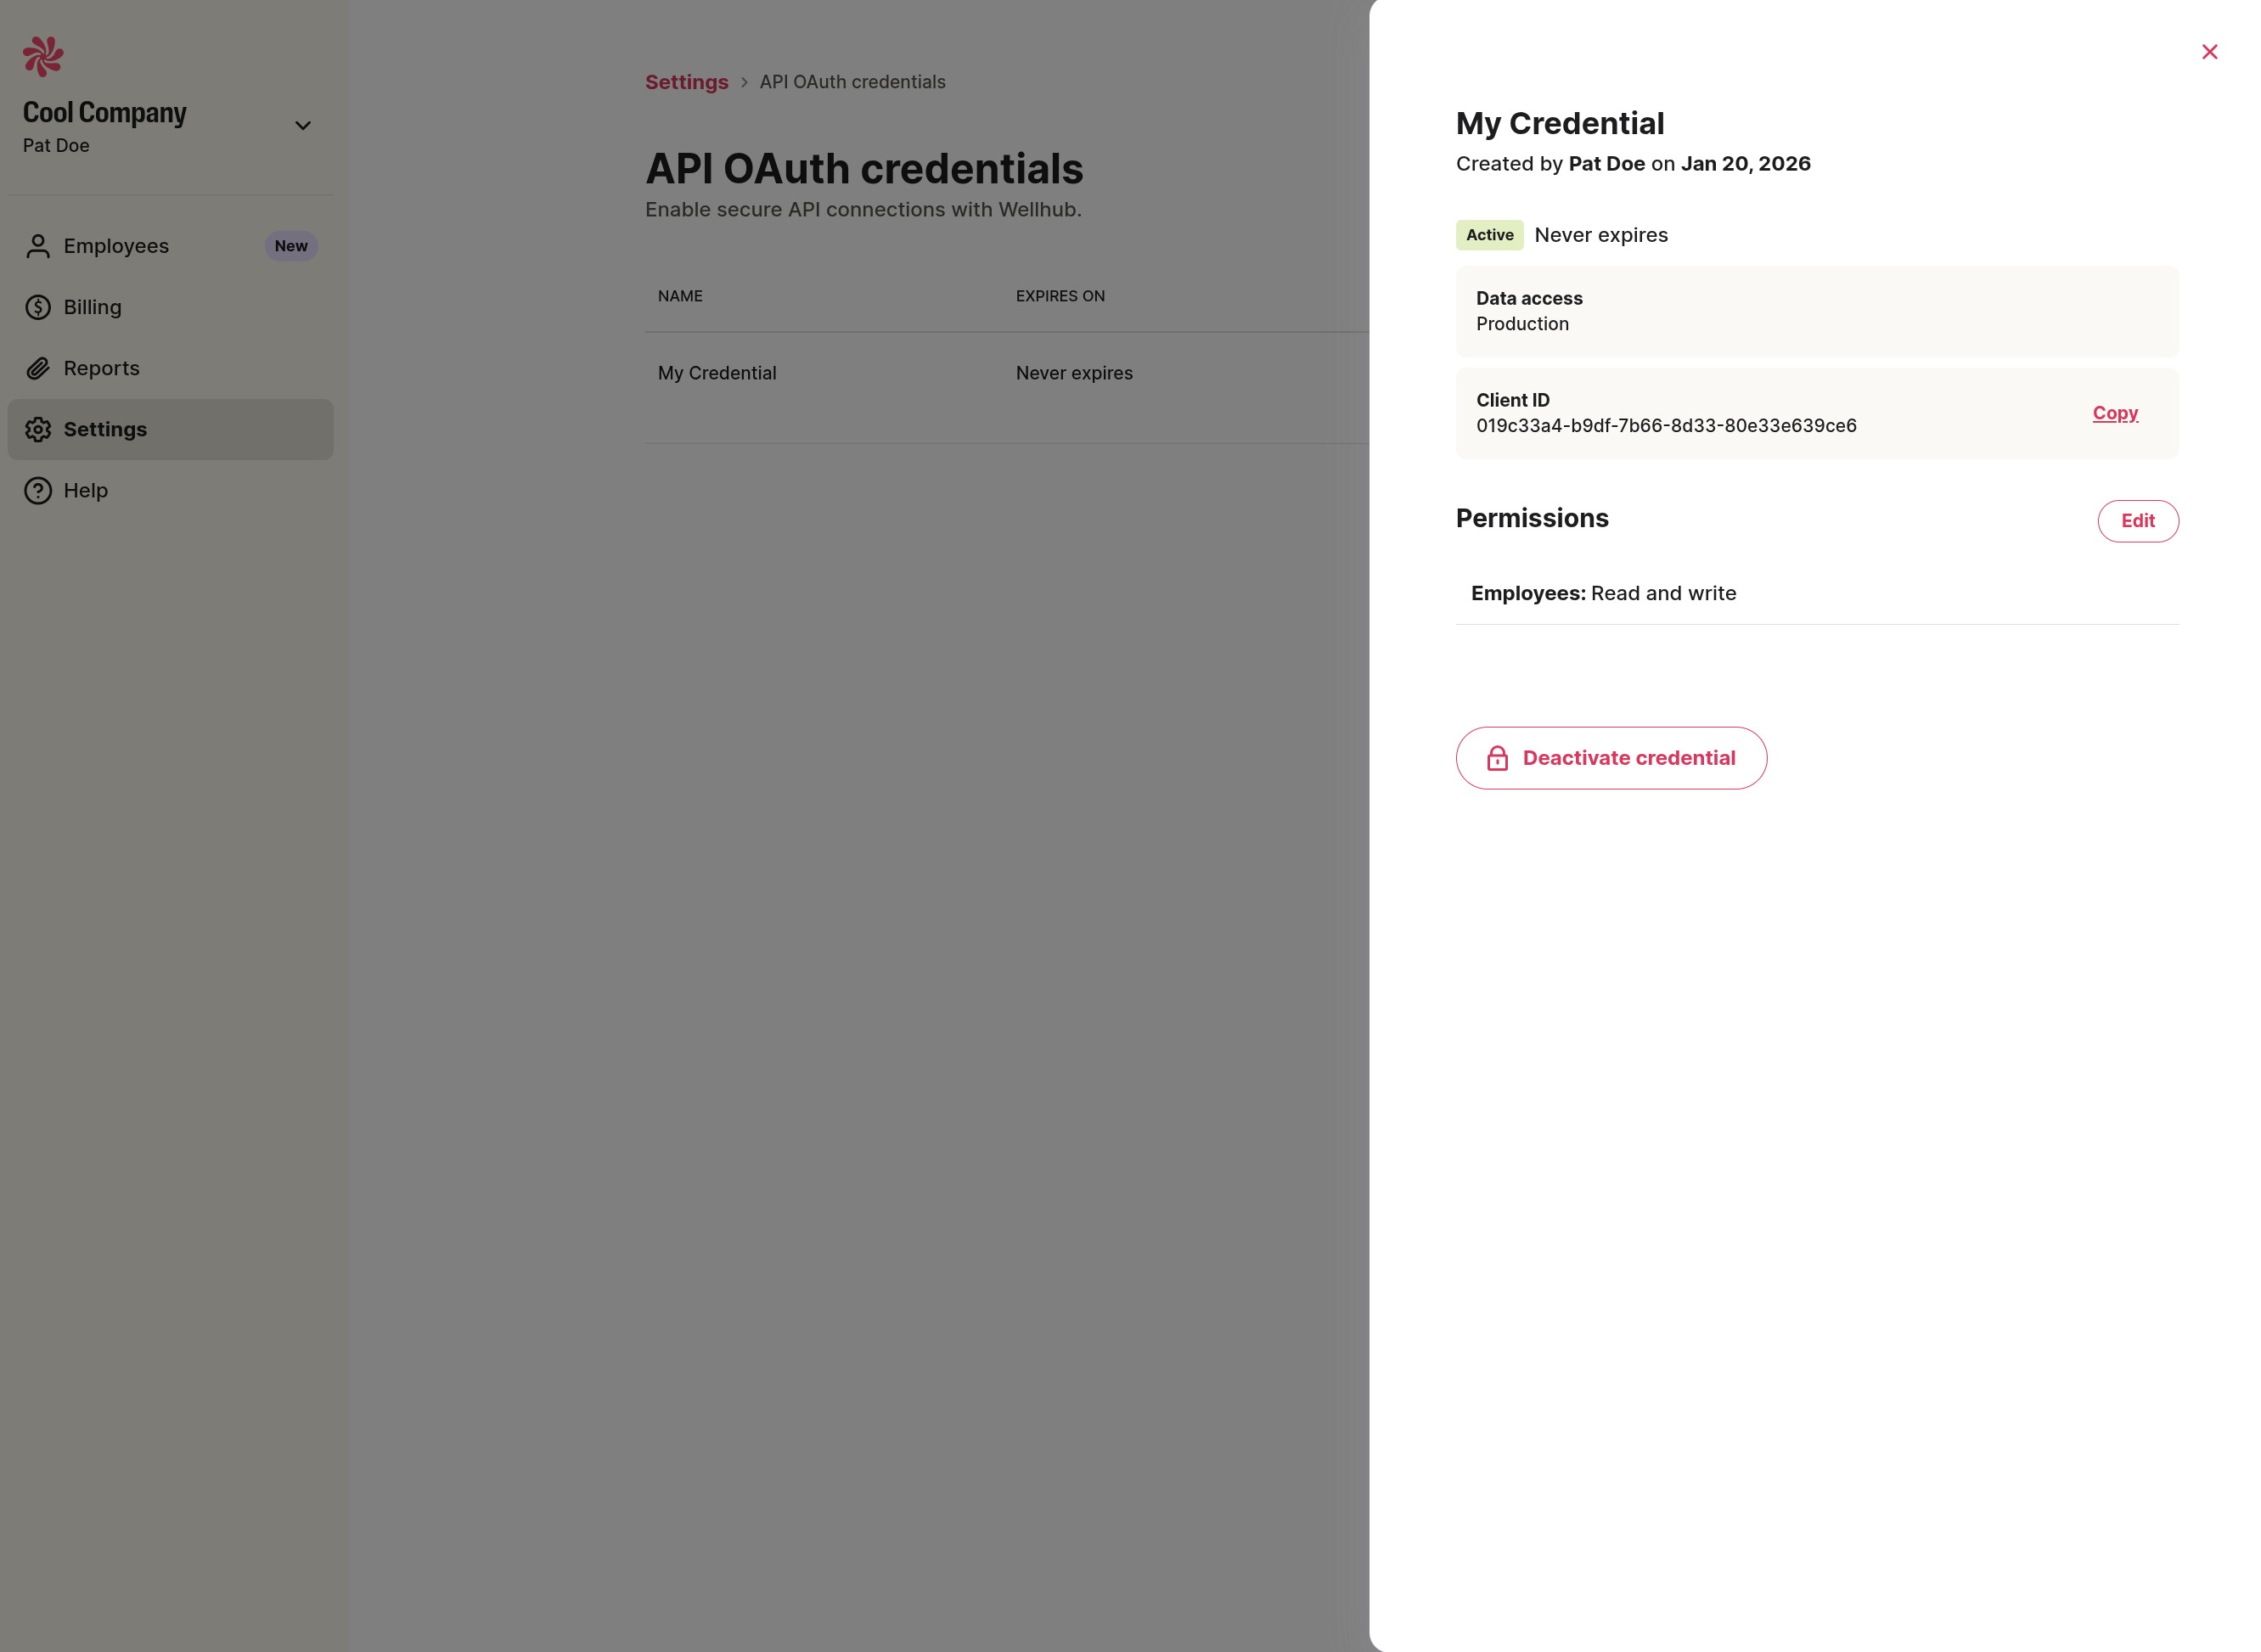
5) View or manage credentials
Open an existing credential to review details, copy the Client ID, edit permissions, or deactivate the credential.
Generate an OAuth token
Use the token endpoint to exchange your client credentials for an access token.
Create Authorization Token
Endpoint
POST /oauth/token
Parameters
| Name | Required | Description |
|---|---|---|
| client_id | Yes | Your OAuth client ID. |
| client_secret | Yes | Your OAuth client secret. |
| grant_type | Yes | Use client_credentials. |
Headers
| Name | Required | Description |
|---|---|---|
| Content-Type | Yes | application/x-www-form-urlencoded. |
Response codes
| Code | Description |
|---|---|
| 200 | OK |
| 400 | Bad Request |
| 401 | Unauthorized |
| 500 | Internal Server Error |
Example request
curl -X POST "{{BASE_URL}}/oauth/token" \
  -H "Content-Type: application/x-www-form-urlencoded" \
  -d "client_id={{CLIENT_ID}}" \
  -d "client_secret={{CLIENT_SECRET}}" \
  -d "grant_type=client_credentials"
Example response
{
  "access_token": "eyJhbGciOiJIUzI1NiIsInR5cCI6IkpXVCJ9...",
  "expires_in": 3600,
  "token_type": "Bearer"
}
Environment URLs
- Sandbox:
https://pilot-api.clients.wellhub.com - Production:
https://api.clients.wellhub.com
Use Sandbox for testing before moving to Production.
Throttling
Requests are rate-limited. Current limits are TBD.
Requests beyond the limit return 429 Too Many Requests.